How to Make a Drop Down List in Powerpoint 2016 TUTORIAL
How to Make a Drop Down List in Powerpoint 2016
Drop-down menus in PowerPoint permit you to create flexible, interactive slides. PowerPoint driblet-downwardly menus can help you make interactive self-led presentations, documents, eLearning, training materials…. the list goes on and on! A drop-downward menu in PowerPoint can exist used for cleaning upwardly busy slides or combined with hyperlinks for smoothen navigation.
To take a sleek and – most importantly! – fully functional drib-downward carte in PowerPoint, yous'll demand to go to know the Blitheness Pane and Selection Pane like never before.
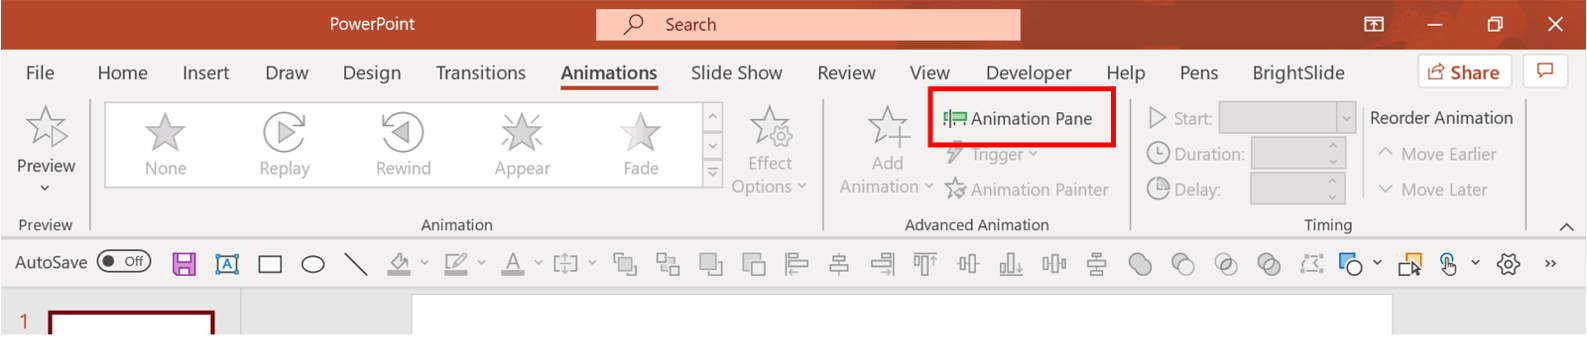
To access the Animation Pane, go to the Blitheness tab and select Blitheness Pane.
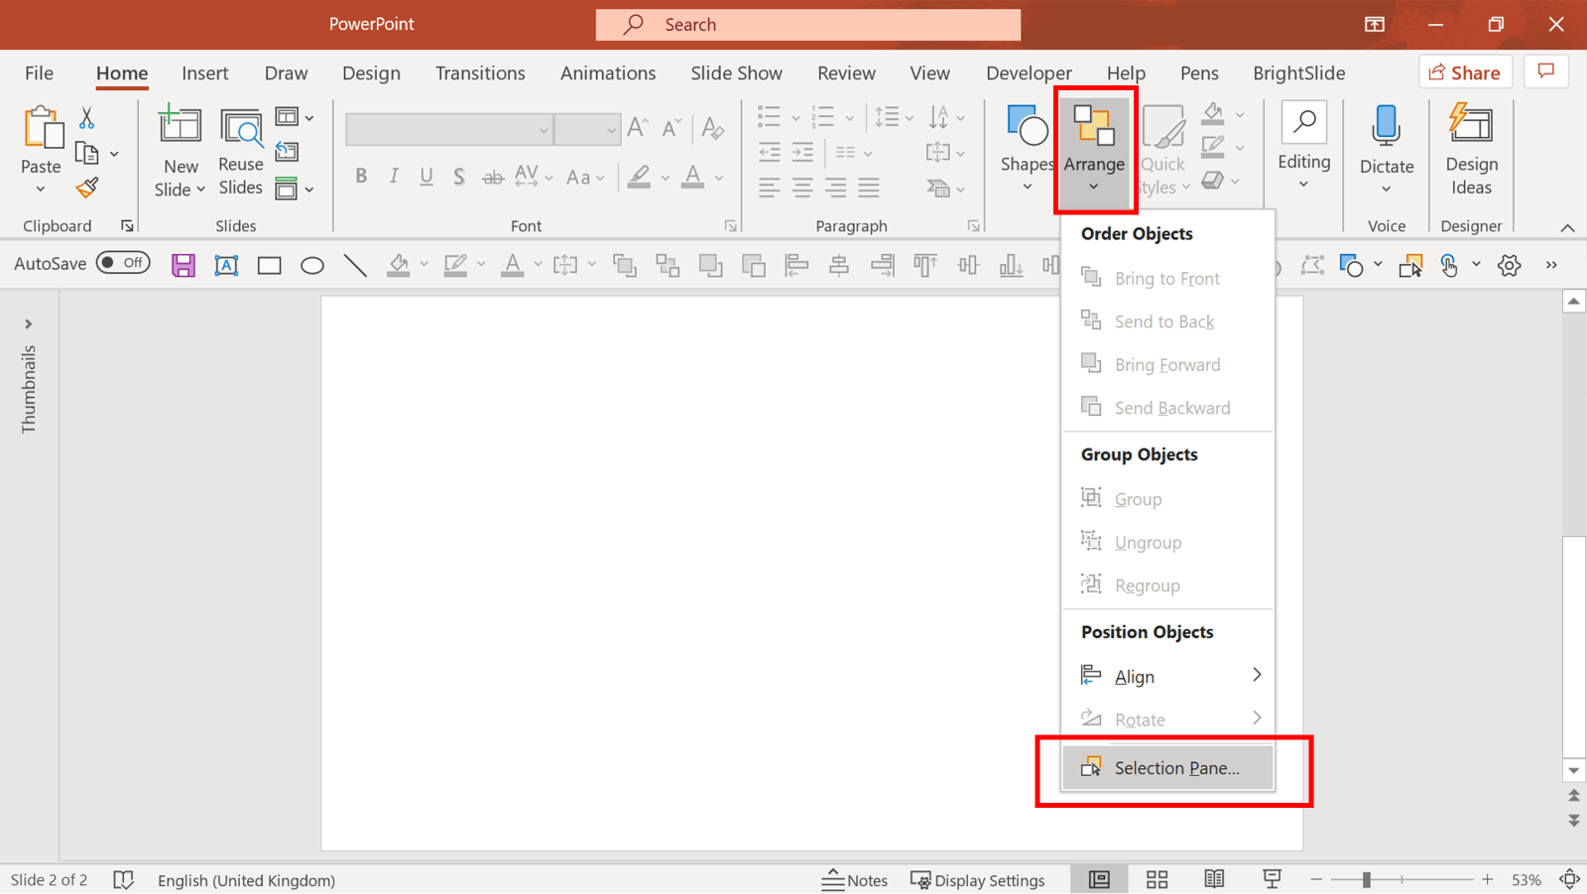
To access the Option Pane, in the Home tab click Arrange, and so curl downward to click Selection Pane or press Alt+F10 on Windows.
Let'due south get started!
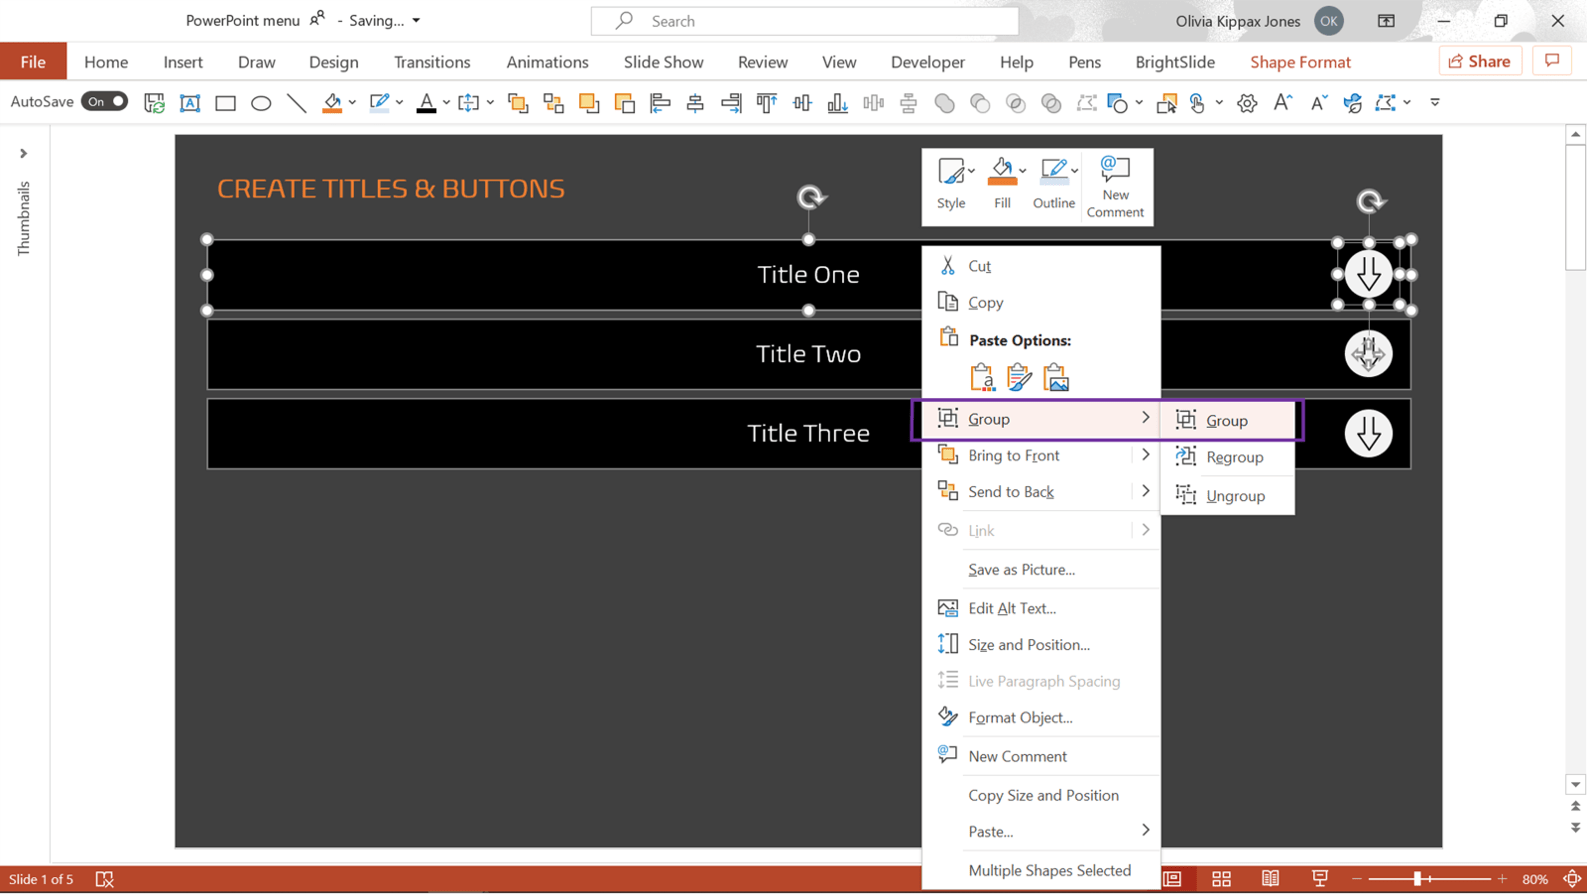
Pace 1 – Create titles and buttons
Start by designing your title bars using PowerPoint shapes. These will human activity every bit buttons for your users. If you lot've used multiple objects to create a button, group them together by selecting the objects, right clicking and selecting Group. This will make them easier to breathing.
Side by side, characterization these groups in the Selection Pane. Naming the unlike components of the PowerPoint driblet-down menu is your key to success as there are so many moving parts (literally!). When you lot come up to animate your drop-downwards menu in PowerPoint, knowing what is what is really important. I've named the push button groups: TITLE1, TITLE2, TITLE3.

Step 2 – Add together content boxes and triggers
Next, create the content you desire to appear nether the first title in your drop-down menu. Once more, group your objects together and rename the grouping in the Pick Pane, something like 'Content one' is fine.
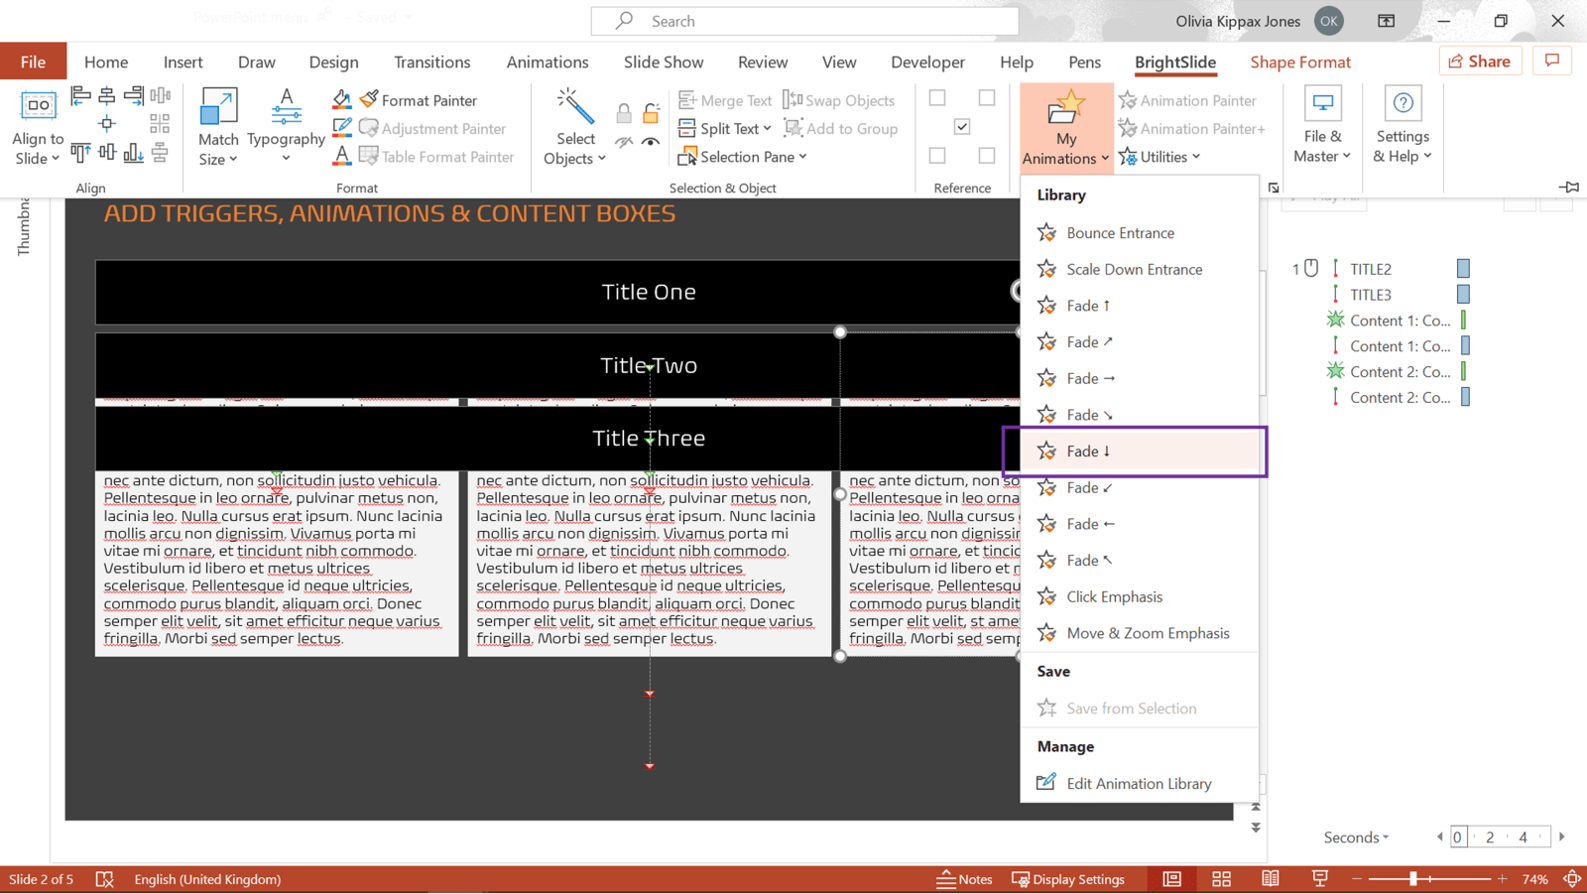
Now it'due south fourth dimension to animate your drop-downwardly carte. Think nigh what yous want to happen when a user clicks on the elevation title bar. Beginning, the two other options need to move downwards to make room for 'Content 1' – utilize a Motility Path animation. Side by side, 'Content 1' needs to announced – use a Fade in animation. Alternatively, if you have our free productivity and design add in BrightSlide, head to your blitheness library and use the Fade down animation for a really sleek wait!
Finally, insert a trigger. Usually in PowerPoint animations are initiated by a mouse click (or pointer click). Triggers let you to initiate a sequence of animations by a user clicking on a specific object on your slide. In this case, you want the animations you take only created to play when you or your user clicks on the first button.
To do this, in the Animation Pane select the first blitheness in the sequence then select Trigger in the Blitheness tab. In the carte click On Click of and then TITLE1 (or whatever you named your get-go button).
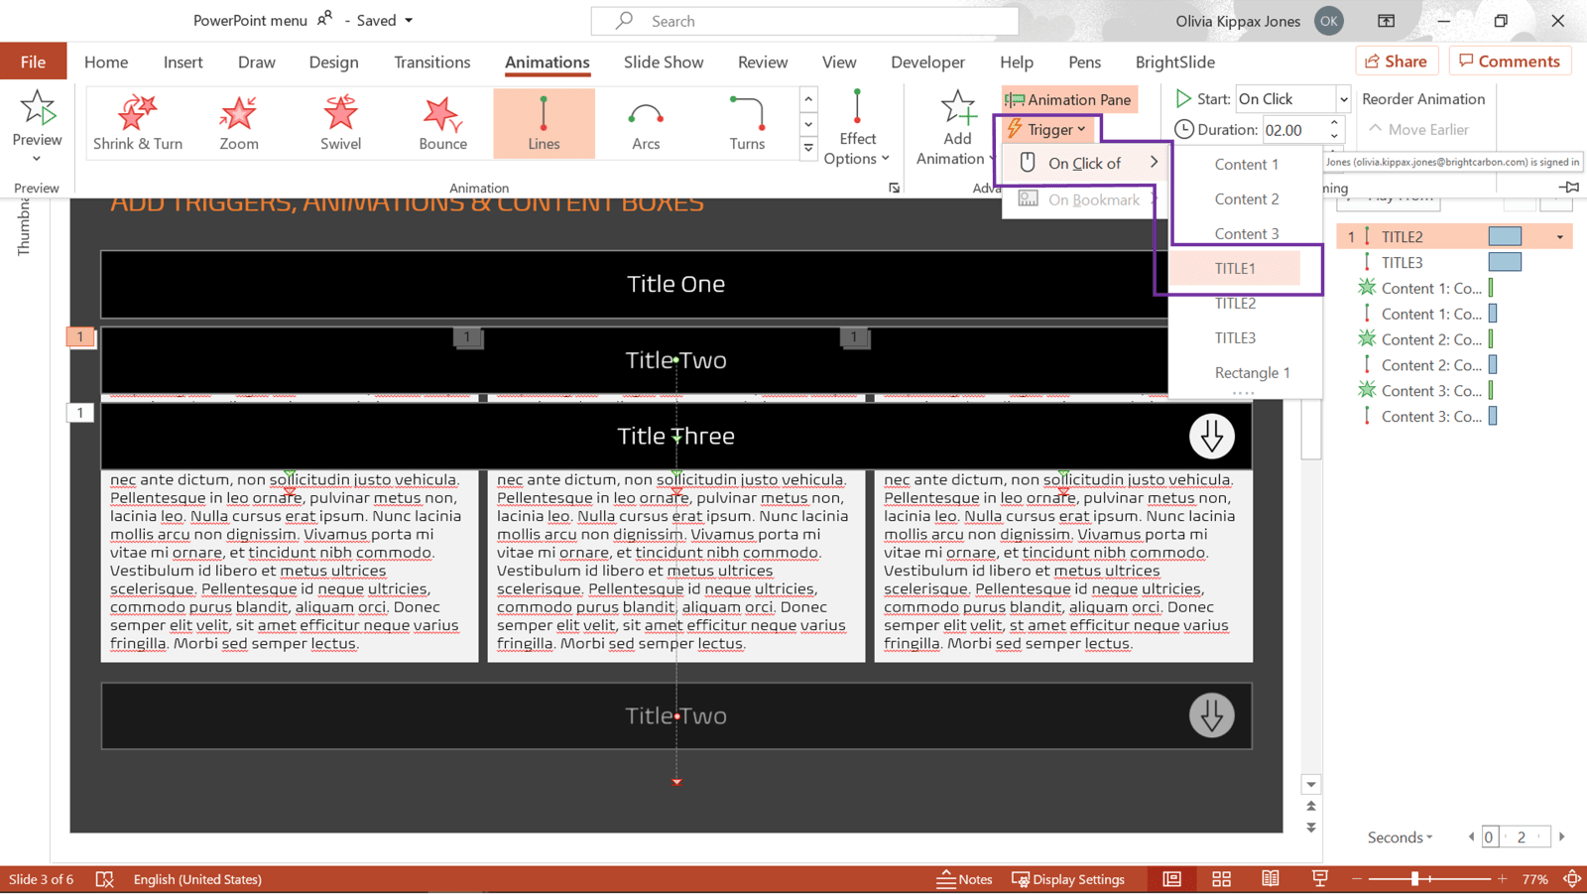
Then drag all the animations you created nether the newly created trigger section in the Animation Pane.

You can now test the animation by popping your slide in show mode.
Triggers can be tricky to become your head round at first, if you lot need a more in-depth guide click here.
Step 3 – Add mask and 'on' title option
Next, insert a mask – a rectangle with a transparent fill and outline – on the slide. It needs to cover Title 2 and Championship three at the end of their motility path. This mask volition terminate users from being able to click these options when the content for Title 1 is on screen. Animate the mask to Appear under the trigger you've already fix up.
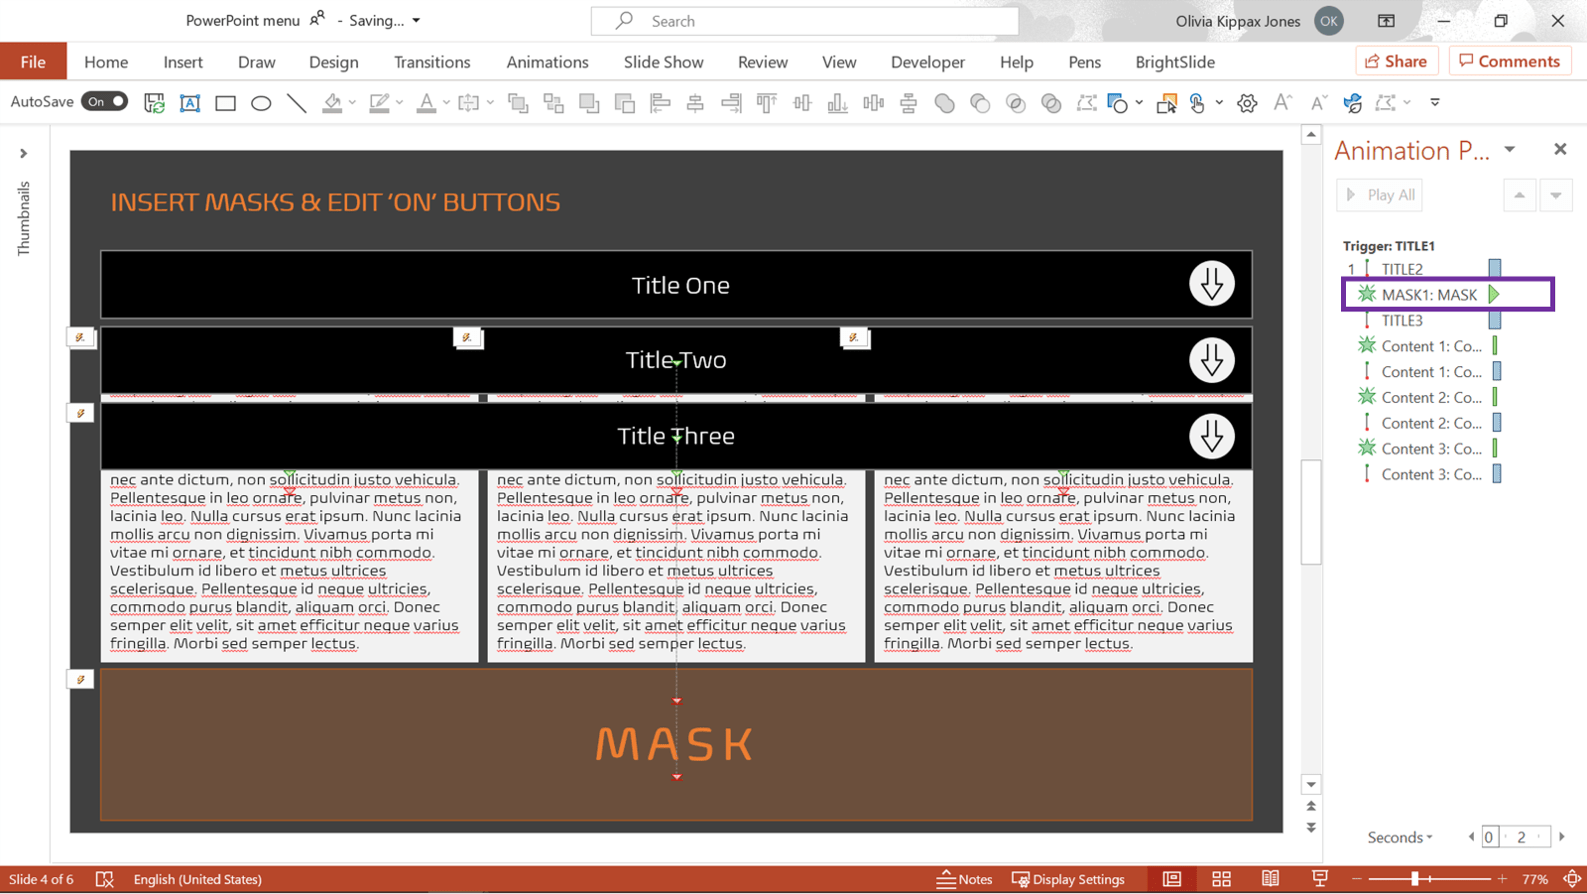
I've made the mask orange then you can see where information technology is, but for your drop-down card in PowerPoint you volition want a transparent mask.
Side by side, create an 'on' country for your title bar. This is what the user will see when they click the bar. Simply duplicate the group and recolour.

Add a Fade blitheness then this appears when your user clicks the Championship i push.
Finally, yous need to forbid users existence able to advance the slide by clicking on information technology. All the navigation should be controlled by your triggers and the drop-down menu. In the PowerPoint ribbon, go to the Transitions tab, and in the Timings section uncheck the On Mouse Click choice.

Top tip: Equally you lot have disabled the selection to advance on mouse click, y'all'll demand to add a hyperlinked button to have your users to the next slide. Read more than almost hyperlinks in PowerPoint.
Step 4 – Hibernate content in your PowerPoint driblet-down bill of fare
Phew! At present repeat all the animations you lot've created, but backwards!
Begin past calculation a Fade out animation to the 'on' version of your title bar. Set a new trigger for this animation to outset when the user clicks the 'on' version of the Title one button. And then:
- Fade out your content
- Motion path the other ii championship bars back up
- Fade out the mask
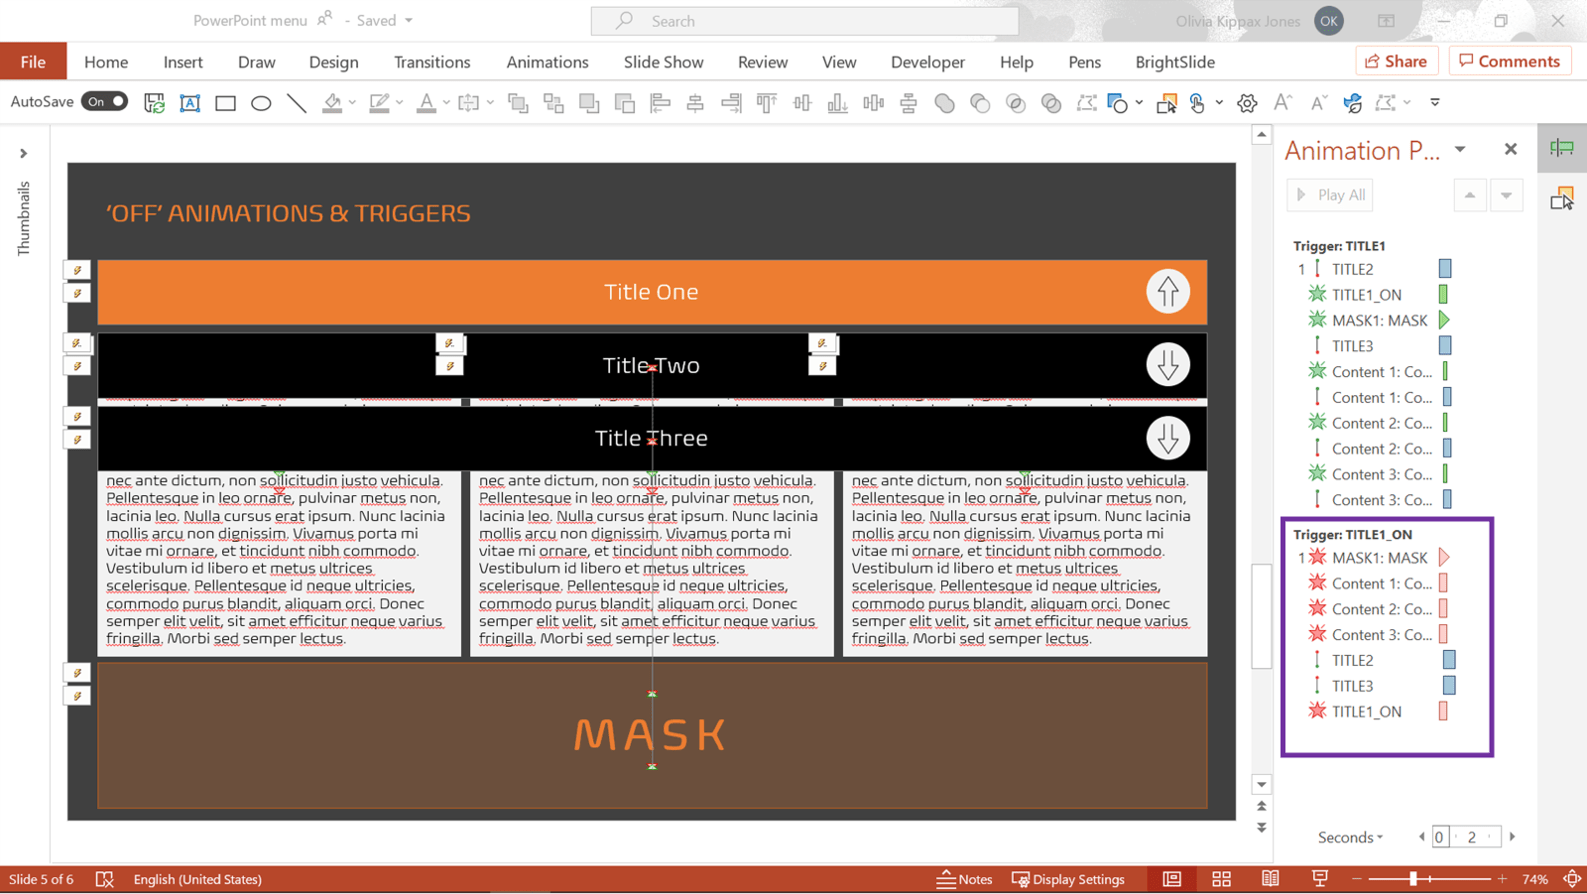
This screenshot shows all the animations I used to reverse the drop-downwardly event under the second trigger section. Now you should have one group working perfectly.
Step five – Rinse and repeat
Repeat these steps for the Title 2 and Championship three buttons and content. Call up to add together in the masks at each stage to end your users breaking your slide. The more options your users have, the more than packed the Animation and Selection Pane will be– this is why it's and so of import to label everything.
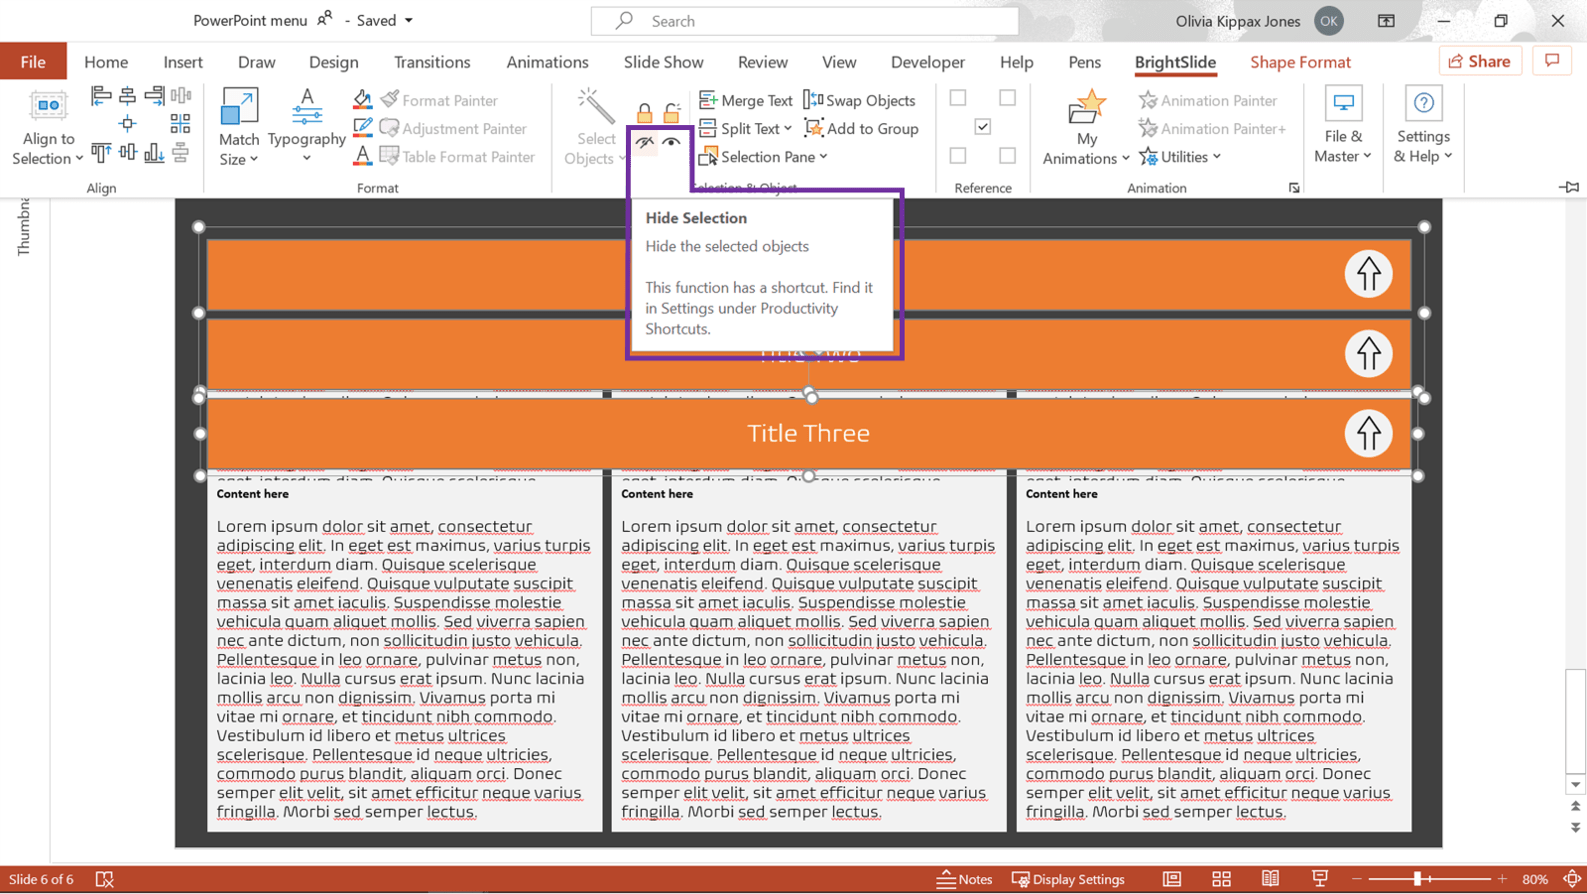
Tip: Use BrightSlide's Show/Hibernate characteristic to help you lot piece of work on your slide without having to movement objects around. Simply click Hibernate to hibernate the selected object/due south then click Show to show all objects.
This is what your finished PowerPoint drop-downwards bill of fare should look like. Your user tin can click the bars in any lodge, whatsoever number of times.
Stride six – Save your drop-down carte as PowerPoint Show
Finally, save the deck as a PowerPoint prove (ppsx). Go to File> Relieve as and so select PowerPoint Bear witness.
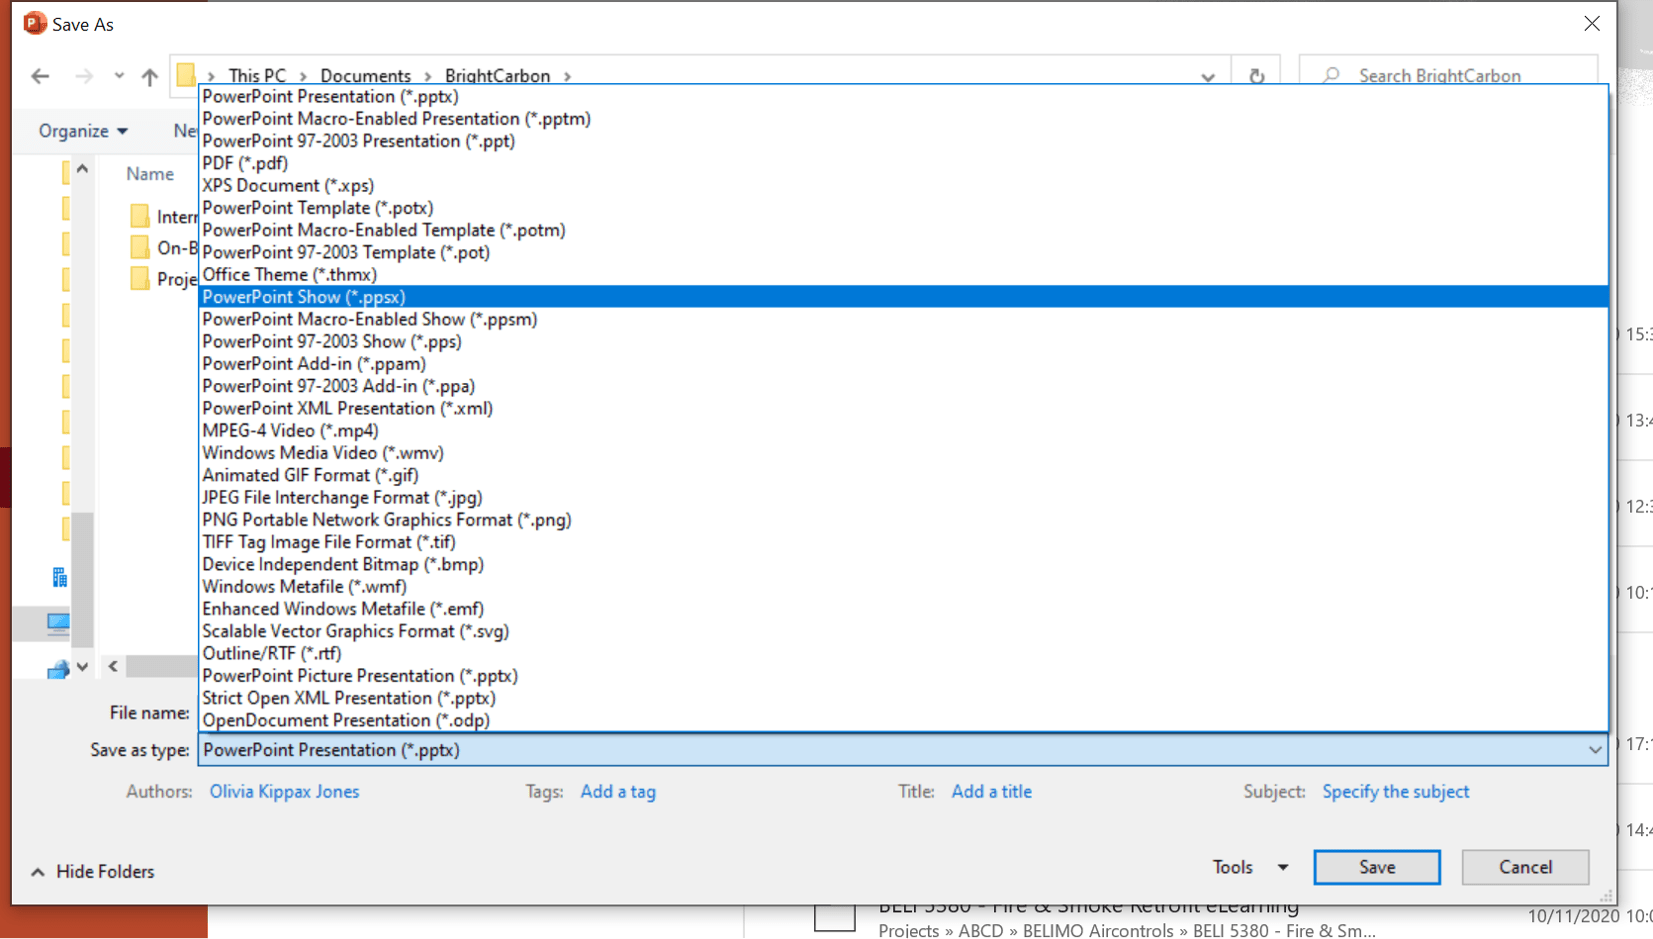
If you lot save your PowerPoint presentation as a PowerPoint Show it automatically opens the deck in slide show mode when the file is opened then your user doesn't meet the slides in edit mode. This is a great option if you're sending the deck to colleagues or a customer or using it in a berth or kiosk.
And that's how you create a driblet-down menu in PowerPoint! If you accept any questions leave them in the comments and we'll practise everything nosotros tin can to help!
For more on interactive presentations swoop into Supercharging PowerPoint interactive presentations with VBA or How to make interactive PowerPoint slides for eLearning.
Go out a comment
DOWNLOAD HERE
How to Make a Drop Down List in Powerpoint 2016 TUTORIAL
Posted by: jerilynpubilty.blogspot.com


Comments
Post a Comment